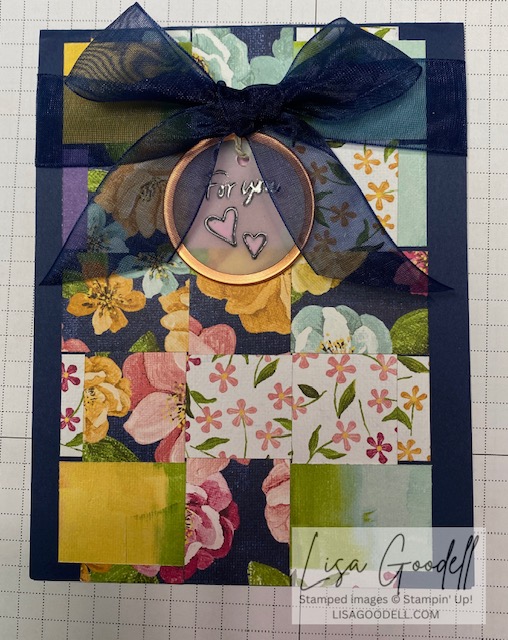
This is part of my new series: New and Old, which means every once in a while I will post a blog project that uses current and old (retired) Stampin’ Up! products. (I do have some old products that could be considered vintage – from the turn of the century). For this project, I used retired items: A metal edge tag made of vellum and a copper tag, and night of navy organdy ribbon.

For this card, I did the paper weaving with 1-inch strips of the current item Hues of Happiness Designer Series Paper. To weave, set 2-3 strips side by side vertically. Then take another strip and slide it under and over in alternating fashion. Add more vertical strips if you want. After you finish with the top horizontal strip, then get the next one. Be sure to do the opposite of the top strip… where the first strip went over, make the second strip go under, and so on.
When I was done, I thought it was pretty busy looking so I wasn’t sure what type of sentiment to put on it. I didn’t want to layer a lot of cardstock or use a lot of dies, since I wanted the paper weaving to be the focus. I made two card bases with the weaving using Night of Navy cardstock. Then the card sat for months. I’d get them out and look at them, then set them aside.
But this morning, I was going through an old drawer with tags and eyelets from a long time ago and I saw the rose gold-edged vellum. I thought, wow, I could use that… The vellum is translucent so the paper would show through in a subtle way. Then I remembered I had some old Night of Navy 5/8 inch organdy ribbon, also from a long time ago. I thought that width would be better with the wide strips I used for the paper weaving.

Next hurdle was what to stamp. I ended up using Versamark and Night of Navy ink to emboss clear embossing powder for the sentiment and hearts. I did that because I don’t have Night of Navy embossing powder (I doubt Stampin’ Up! ever made it). But no worries, because I just took the stamps and arranged them on a clear block. Then I first ink the up in the VersaMark ink, then tapped twice in the Night of Navy, then stamped. Right away I spooned some clear embossing powder over the top of the wet ink. I used a tiny paintbrush to wipe away stray embossing powder grains, then used a heat tool to emboss it. Finally, I used a tiny circle hole punch to make the hole at the top.
Next, I tied some Stampin’ Up! twine (I don’t remember its official name) around the night of navy ribbon and made a knot, leaving 2-3 inch ends. Then I put the twine))) in the hole and ties at the knot of the back of the ribbon. I got a strip of Night of Navy ribbon and put it across the front of the card, folded it around and taped it on the backside. I tied a bow with a separate piece of Night of Navy ribbon using the bunny ear method ++++ and used a glue dot to adhere it to the front of the card, right on the ribbon.

Inside: I glued blank whisper white cardstock on the top half to cover the ribbon ends and tape. For the bottom half, I glued a 1/2 inch strip of matching designer paper along the bottom on another piece of 5 1/2 x 4-inch whisper white cardstock.